
Creating a 3D Model of a Building From Reference Images (non-orthographic) |
IntroductionIn this tutorial, we will make a 3D model building from still images (non-orthographic). We can very easily make a 3D model if we have any information on the measurements. For the first step, we will examine the minimum reference image and try to extract any information and measurements of this particular building. Creating Guide Scene: Setting up the Guide SceneWe have two pictures as our reference. These picture show a train station which is located in Semarang, built during the Dutch colonial era in Indonesia. I don't have any information about its measurements whatsoever. 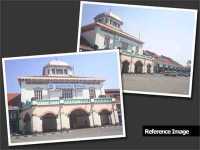 Reference Images: [Reference Image 1] [Reference Image 2] Open MAX, Displaying the Background in the Viewport.Open viewport background window view>viewport bacground..(alt+b) Viewport " front".background set in front viewport. we can use any orthographic viewport, because we just need 2d view. Click "Files.." button.select ref image. Check Lock zoom/pan.background autoresize when zoom/pan. Match Bitmapbackground aspect ratio. 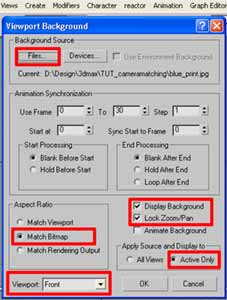 Background Texture Sizewe need fine detail in viewport background. Costumize>preferences>configure driver>background texture size>check match bitmap as close as possible. but if ref image resolution is 1024, i prefer using 1024. so uncheck match bitmap size. Maximize your viewport and you can turn off the grid.press"G" to show/hide grid 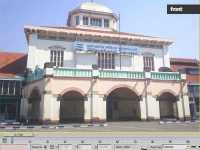 Point Perspective & Horizon [line_setup]Use Line to find Vanishing Point. enable in renderer enable in viewport. 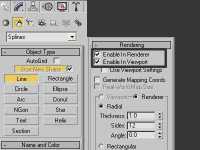 Vanishing PointLook at the edge of the object from ref image, find the VP within the picture area and draw a line by continuing from the edge. You will get all red line from edges, parallel to y axis(world coordinate system). Now we have a vanishing point/point perspective, its location must be around there. For the next step, we should look for other vanishing point/point perspective. But with this ref image, it will be quite difficult to find. There are approximately 3 point perspectives on that ref image. You should familiarize yourself with the point perspective system ( one point perspective - six point perspective ). Scroll to the bottom to see links and references for more info. 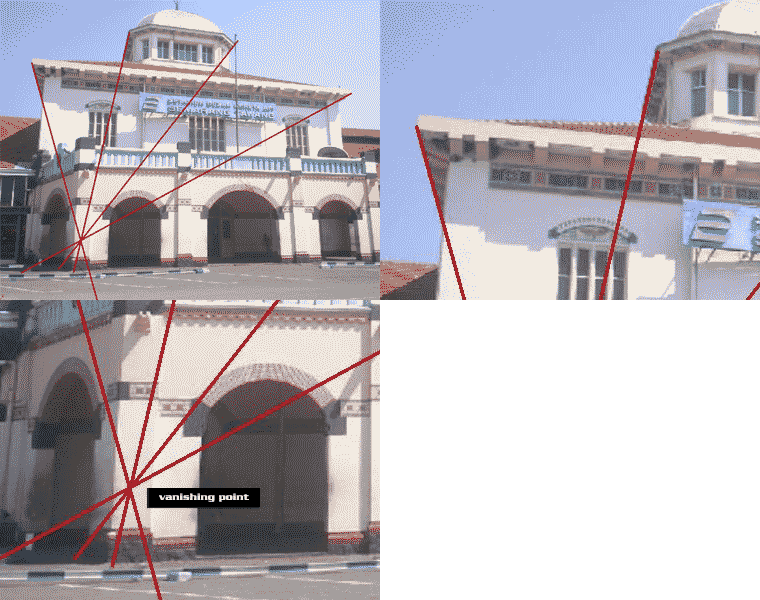 To solve the problem of seeking out other the point perspectives, draw lines that form the basic shape of the building. 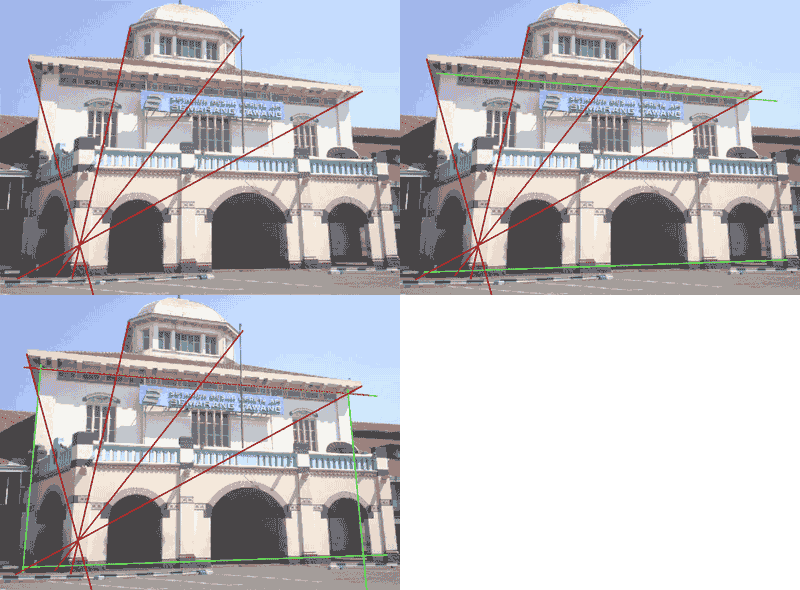 Additional Line GuideAdd additional lines. HorizonApproximate the location of the horizon.(because we can't see the horizon in the ref image). The horizon will be parallel to the X axis (world coord. system). Most photographers will keep a horizon horizontal. Create a box as a line (a box is horizontal by default). We can estimate the position of the horizon. Position of horizon and vanishing point are not in a line -- is my estimation of the horizon wrong? Set up a rendering backgroundSet ref image as environment map. On the menu bar choose Rendering > Environment>Environment Map> pick Bitmap>select picture. RENDER (same as ref image resolution, ex 1024x768)Save as Blueprint1.jpg Save MAX, we might need it later. Additional Guide SceneReset MAX Repeat prev steps, there are different point perspective or vanishing point that you can extract out of the scene. use mousescroll to enlarge canvas. Look for the horizon position by using a box. Lengthen box until you pass the VP. Horizon cuts the VP, that is good forerunner. 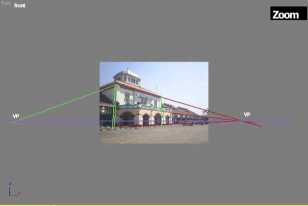 [Click for Large Image] Additional scene is ready now. Set up a rendering background RENDER. Save as Blueprint2.jpg Save Max. 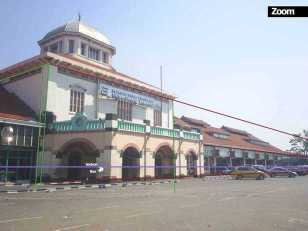 [Click for Large Image] Camera Matching Part 1 To match the perspective of a camera to a photograph, we will need accurate scene measurements. However, if we don't have any information on the measurments, we can still make an estimate and matching the perspective to ref image. Measurements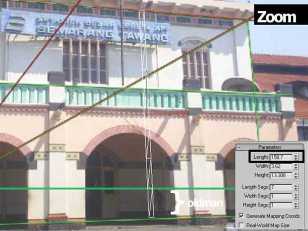 [Click for Large Image] Reset MAX In the frontview, use ref image as background. Analyze ref image, find any object which can be used as a measure or will give us a sense of comparison - I used the elderly man in the ref image. We can guess the height of the man to be about 155cm (a little too short..not a problem) Create a box with height as high as the building (line guide). Rotate the box corresponding to Z axis perspective. add segs box, height of segs according to height of the people - we'll get 7 segs. 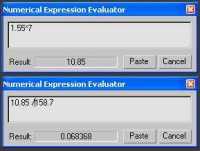 Ctrl+N in any numeric field. to display Numerical exp ev. as a calculator. 155cm x 7 = 158.7V 10.85m = 158.7V V = 0.0678 we get h = 10.85m, V = 0.0678 press cancel to dismiss. we can display a calculator called the Numerical Expression Evaluator ctrl+N in any numeric field. but You can't use Variables in the Expression Evaluator, but you can enter the constants pi (circular ratio), e (natural logarithm base), and TPS (ticks per second). These constants are case-sensitive. 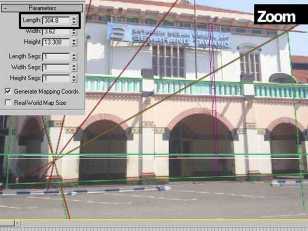 [Click for Large Image] Create a box according to the width of the building. Position the box as close as possible to the horizon. We'll get 304.8 304.8 x V = width. 304.8 x 0.0678 = 20.665m We get w = 20.665m Camera Matching Part 2 Reset MAXDisplaying the Background in the Viewport.Select perspective viewport. add "blueprint1.jpg" (we've made before) in viewport background. Creating Basic ObjectCreate a box, w = 20.669m, h = 10.85m and l = any size don't forget to change unit display. Costumize>unit setup>display unit scale>metric. 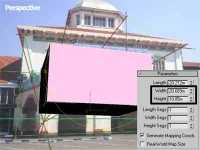 LengthWe'll estimate the length which will depend on the additional line helper/guide we've made. We can assume the length is 30m. Though the length depends on you.. 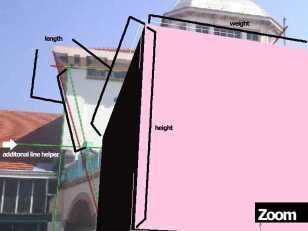 [Click for Large Image] Setup Camera Matchingright click on 3D snap, check only vertex. then click snap to activate (S). 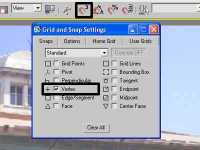 Create>helper>Camera Match>Campoint. 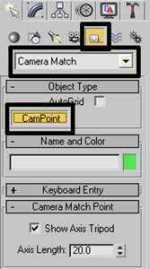 Camera Point helper/3D Point.Create point wth clockwise, so we can easily remember. Open box object properties, uncheck backface cull. and check see-through. Now we can see box backface. 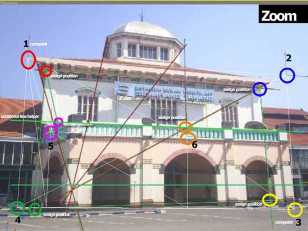 [Click for Large Image] Assign Position/2d point.utility>Camera match>assign position. Warning,"background image ratio should be set to that of the renderer, fix?" yes, ok. A red plus sign will appear on the bitmap. If a red/green plus does not appear, you might be using an OpenGL/direct3d driver. Press ` to redraw the viewport. If the red plus doesn't appear, change display driver. Costumize>preferences>viewport tabs>display driver>choose driver>software>restart MAX 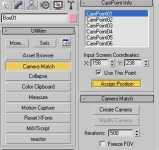 Create camera. We can see that the box does not match with what we expected. That means the estimation of our length is wrong or position of vanishing point is not accurate. 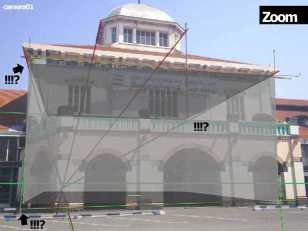 [Click for Large Image] FixingChange position of 2D point and assign new position. We just need to assign new positions for campoint05 and campoint06. A good camera error range is about 0 - 1.5 Change the position of the path at the line guide we've made. 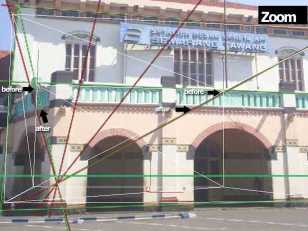 [Click for Large Image] With camera selected, click modify camera. At camera modifier, check show horizon. The horizon is not paralell to X axis(world coord system) since the photographer wasn't a professional (it was my sister:) ). Almost perfect, just a bit more to fix. 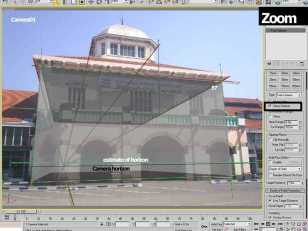 [Click for Large Image] Now that we are satisfied with match result, we can see the camera positions that have been made. The photographer height is about 165cm and camera position is about 160cm.. Camera Matching Part 3Camera matching for the second image. 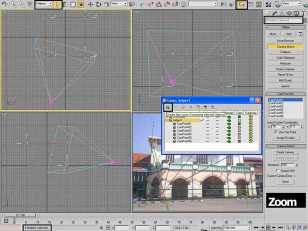 [Click for Large Image] We should hide the 6 campoints we have made into their different layer. Selection filter>helper select all>Layer Manager>create new layer. rename helper1>hide. 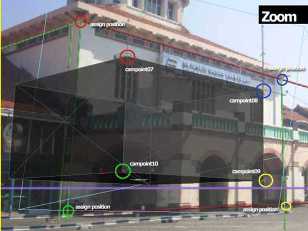 [Click for Large Image] On the other viewport (say a left viewport), change to perspective view. add viewport background with "blueprint2.jpg ". Create new layer. rename with helper2. Create campoint. Assign position. warning again, ok.. Before we create camera, uncheck "use this point" at campoint 1-6, because we don't need it now. utilities>camera match>uncheck use this point. Create camera, Error, not enough points, so we need to make 2 additional points. The problem is, where can we determine the position of the 2 additional points. 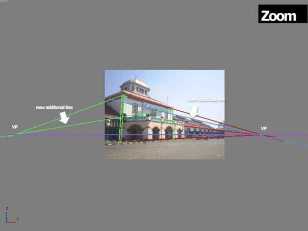 [Click for Large Image] Open blueprint2.max, create additional line guide. and render>save as blueprint3.jpg. 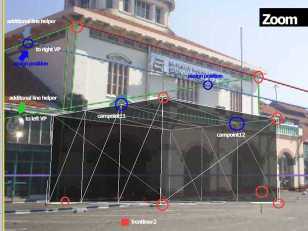 [Click for Large Image] Switch to matching work, change viewport background with blueprint3.jpg. re-set selection filter>all select box> add length segs. Create campoint11 and campoint12. Don't forget to activate snap. Assign campoint11-12 position. Create camera, fix it. A good camera error range is about 0 - 1.5 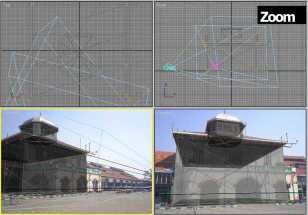 [Click for Large Image] Create a new basic object and match with blueprints. We can added more campoints if needed. I hope this tutorial was useful for you. And trust yourself. Workflow: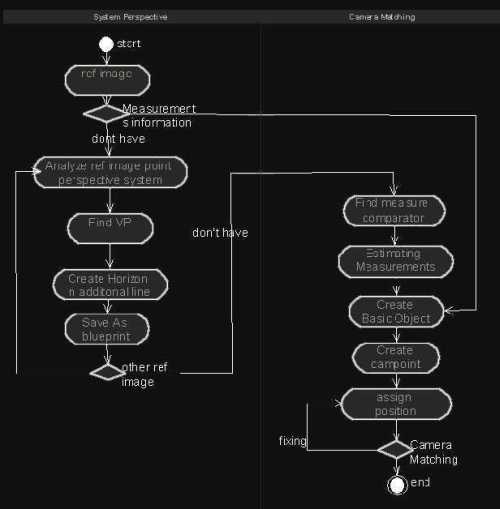 [Click for Large Image] |
| Источник: http://en.9jcg.com/comm_pages/blog_content-art-30.htm |